YEA!!! The holiday seasons are upon us. November is always quite nostalgic for me. Growing up it was the beginning of basketball season (which dominated the TV, extra curricular time and conversation!), my birthday, fall weather and lots of school off. I am always excited for this time of the year and I hope to be able to show my kids the joys that come with the holidays. Since Thanksgiving is near I want my kids to learn to be thankful for all the things they have in life. I also really want them to be good gift givers and receivers (ie. not opening a present and telling grandma that it was not what they wanted). I have lots of close friends whose birthdays are in November, so I thought I would try to make a reusable gift bag. I loved how this came out and am probably going to make a stash for Christmas! Super excited about that! I like the ease of gift bags, but they usually get crushed or some other severe wound in the oh-so-organized closet. (You know you have a closet like that too :), ha!) I have a stash of fabric that I really want to use for something practical. I have seen fabric bags for sale, but they are pretty expensive and not really stylistically what I want to convey. Here was what I came up with.
I started with my stash of fabric. Notice the green and pink fabric has paper on the back. I had cut a square of fabric and adhered no sew interfacing to one side so it was ready for me to cut. I also used ribbon I had on hand so I didn't have to spend anything on this project.
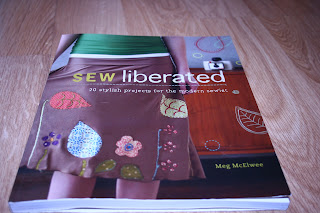
This was the gift I wanted to give. My friend loves to sew and this book screamed her!
I took the measurements of the book and 2 pieces of fabric 1 inch longer on each side and 3 inches longer. My ribbon was 1 inch wide, so I knew I would need at least 2 inches for the casing at the top.
I sewed around all the edges being careful to leave about 2.5 inches on the top not sewn. I do not have a serger, so I used pinking shears to cut the fabric closer to the stitching so there was less bulk when I turned it inside out
.
With the 2.5 inches at the top of the fabric, I sewed each side down. This will become where the ribbon is threaded through. I only wanted the ribbon to tie on one side, so I only did this to one side.
I then printed the words that I wanted adhered to my fabric. When choosing a font it is important to find one that will have enough bulk to create a stand alone letter.
I then cut the words out and pined them to the fabric that already has interfacing adhered to the back. For this project or one that does not require sewing be sure to purchase no sew interfacing. It washes really well and there is no need to take special care.
Here are all my letters cut out. I used fabric scissors to cut along the letters. I then removed the paper on the back of the letters and they were ready for the iron.
Here was my finished bag pre-letters. I then just lined up the letters where I wanted them on my bag and put the iron directly on the fabric with the interfacing. If you read the directions I am pretty sure you are supposed to put another piece of fabric over the letters before you use the iron, but I have never had any problems and like being able to see exactly where my letters are going!
Here's how the bag turned out with the gift inside.
I really love words. I think I might just start labeling everything. My poor family...
A cute bow on the closure and we are good to go! Have a happy day!


No comments:
Post a Comment
I love to hear from you!