Monday, October 31, 2011

Costumes!

I realize that Halloween is not technically over, but I was way too excited about the kids costumes this year. I had to get these on the blog! The girls wanted to be Belle and Cinderella and we have had their costumes for quite some time. Since my precious 5 month old is too young to care what he is I was super excited to make him Prince Charming!!! I was so inspired by the costumes of Ashley at Make it and Love it. You can check out her little one's prince charming costume here who I modeled my costume after. If you want to check out some cute costumes check out her blog! She made some adorable Mary Poppins ones this year. Anyway, I took elements of her tutorial and came up with my Prince Charming costume for the little guy. Here are some pics of the fun we had!

Here is an up close of the top after I finished it. I had everything on hand except the gold ribbon, so I ended up spending only $2 on this costume, score! Also, I did use a onesie I had on hand and used a glue gun to adhere the gold cording and fake buttons to the onesie. It worked great!


Here it is on the little guy.  He cannot stand up so he is getting some help!

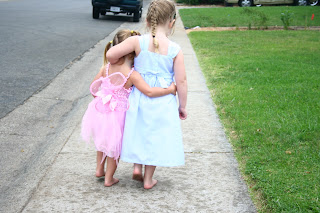
A picture of all the royalty! Yes, this is the best picture of all three of them that I got!

I love this pic :)

I loved how this costume turned out, I might just have him wear it again for fun!
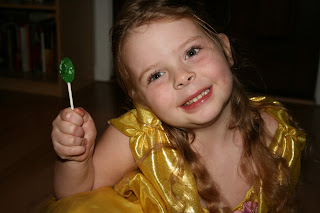
Belle enjoying the spoils from her night out!

Cinderella enjoying her sucker, as you can see it dripping down her face. She has always been soooo messy. I promptly had her take off her dress, Ha!

I hope you enjoy some of these pictures! We had a great night and hope to remember the ways that we have allowed God's light to shine into the darkness through us!


Tuesday, October 25, 2011

Some refashions...

This fall has been flying by for me. My baby is 5 months old and just had 2 teeth pop through. I honestly thought he was too little. Recently I have been trying to slow down. It is not easy for me to do (or for most people for that matter). I like lists. I like checking things off. I like being clutter free. I like simple. Unfortunately, in this season of life those things are quite difficult to achieve. I keep reminding myself that this is a season. As it is fall here in Chico the leaves are just starting to change into beautiful hues of yellow, orange, red and browns. We visited a farm and were able to going on a big harvester and watch the rice be harvested (so fun!) and are enjoying the cool temperatures. All this reminds me that there is more change to come. Soon it will be winter and many more changes will come. I need to slow down and enjoy the moments I have with my children. They are short and precious.


Out at the rice fields!

Ok, enough of that. I really enjoyed making and repurposing clothing lately. Here are some of my before and after pictures of some clothes that I have changed with a brief description.


 Here is a skirt that I had that was waaay too long. I liked the way it fit on top, so I chopped it short and cut a strip of fabric 8 inches wide, folded it in half and ironed it. I then sewed it to the bottom of the skirt to create a shorter skirt that I will actually wear!!!


The after skirt!


Here is a sweater that I have been hanging on to from high school (yikes!) I don't like the length, but who doesn't like a black sweater? I cut it short and then just used iron on hem tape for the bottom. I really like the new length as is flairs out at the waist.


Here is the after!

I also bought some knit fabric and made a very simple Yoga skirt. You can find the tutorial that I used here.


It is a fun skirt that I enjoy wearing!

Here are a couple of dresses that I made from the Simplicity Pattern 6387. I liked the fact that it said EASY on the front and was only $.99 on sale at Joanns, score! I bought yellow fabric in San Francisco and fell in love with it. It is a Robert Kaufman fabric that I thought would create a great fall dress.


This is my older daughter's dress, I love the apron!!


This is my younger daughter's dress.


The girls love the pockets on the apron. These dresses only took about 2 hours to put together! Not too bad for a cute dress!


Thanks for checking in!

Monday, October 17, 2011

Subway art

 A while ago I posted on some subway art I had done (if you want to check it out click here.) A friend had seen it and asked if I could do a Bible verse for her family. I told her I would love to do it! She wanted some verses from Romans 12 and some small blocks. I asked her for some pictures of these on the wall and she graciously gave some to me. She is a great photographer and my kiddos love her! You can check out her blog here. I thought I would show you some of the word blocks before and then after on the wall. I had a ton of fun doing these and are glad that they have spruced up their space! 

A couple different looks of the small blocks that I made. They are all 6.5 x 11 inch blocks.

 Here are the pictures of them up. Fun to see them in action!


I didn't get a picture of the big art, but it is from Romans 12.

Thanks Jenee for the fun pics!!!

Monday, October 10, 2011

Hall Change!

I love batten and board! I looked up tutorials on how to do it and I found about 2,747,832 different ones. Seriously, there are a lot! I have this funky space in our hall that was just begging for something. I didn't want another thing to clean, but we really needed some kind of coat rack. After pa-rousing the web, I definitely landed on batten board. I really enjoyed this project. It was a lot of bang for little buck. It did take about 4 weeks for me to finish this, especially since I decided to paint the whole hall! There are definitely great tutorials on the web so I'll just show you my transformation.

 This was the corner of my hall. It was plain and needed to become useful!

 I used 1x2 and 1x3 for the board. I used liquid nails to adhere it to the wall. Screws and blue tape were my favorite to keep them there!

 I had thin baseboard so I cut the bottom of the 1x2 at a 45 degree angle to tie it in.

 I then caulked that baby up and got it ready for paint.

 I then primed and painted the wall and boards. I then decided that I needed to paint the whole hallway.

 Here it is all done! Yea. This is a view from straight on.

 This is the view from looking down the hall.

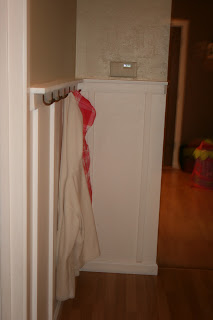
 I really like the double hooks so I can hang more things! Not a bad deal at $3 for 2 hooks!

 This is also some vinyl I did above the kids baby pictures in the hall. I really like it :)!

A close up of the vinyl. I really love the new color of the hall! I love the hall being functional and pretty. What more can a girl ask for!

Also, my grandma wanted to see some recent pictures of the kids. Here they are grams!

 Awww. Sisters!
 I love this pacifier, so fun for the fall.

Have a happy day!

Tuesday, October 4, 2011

Quick shirt

I had seen this shirt on Pinterest and thought it would be so fun to make. It looked really easy and I thought if I could make it pretty quick it might be worth my time!! My cousin has moved to the same town where I live and so we had a fun night of watching a movie and I sewed this top. Fun times for an old lady like me! Ha! The shirt I used for inspiration is located here.


This is the fabric I picked for my shirt, it wasn't my absolute favorite, but I like making things twice. The first time I figure out all the bugs with the pattern and the second time it usually turns out perfect (ok, not perfect but much much better!) So this fabric was in the clearance section so I could take a shot at it!


First I measured the widest part of my torso. It is usually in women's hips, so it is a good place to start and then I added 1 inch for seam allowances and cut two rectangles measuring length by how long I wanted the shirt. I first sewed the sides together and left about 5-6 inches open for the armholes.


I then pressed the seams open and sewed the armholes down.


I then folded down the top of the tank about 2.5 inches and sewed the tube closed.


I then folded and ironed a hem on the bottom of the shirt and sewed the hem.


I then cut 2 feet of fabric about 4 inches wide and folded over the fabric right side to right side. I then sewed it closed and turned it inside out and ironed it flat.


I then put the fabric through the two tubes on the top of the shirt that I had created. I tied it off on the side of the shirt. Here it is on me (let me just say I do not like posing, ha!) It took about 1 hour and I think I am ready to do another one in a solid color. Should be fun!