Tuesday, January 24, 2012
Easy Girls Apron
Monday, January 16, 2012
Rope Bracelet
I am thankful to be back blogging after a couple of sick days and the end of our time in Southern California. Christmas always goes by in a flash and then it is the new year. Maybe some of you had seen these, but I had seen these bracelets on Pinterest and really wanted to try making them. I was SO sad when I couldn’t find them again (note to self, pin if I like!!). I looked and looked and finally found the tutorial. I was super duper excited! Here is a picture from sewcraftcreate and a link to the tutorial on her blog.
I thought I would show you what mine looked like and how they would turn out if you didn’t have a sewing machine handy and a couple other tips I found handy.
The directions on her blog are excellent! I found that I really preferred to use a fabric that frayed well instead of one that was stiff. I didn’t use any knit, but I’m sure those would turn out well. Also, using a needle and thread was nice to be able to attach the buttons with out having to get up again (yes, I am lazy!).
This is what I started with. I found that it was just as easy to use a needle and thread rather than a sewing machine to sew the ends to the main fabric. I loved that I was able to make these while watching a movie :)!
Here is a picture of my close up stitching! I know, not so straight, but it works!
I followed her directions and ended up with this. These were fun to make and definitely a quick project. I have lots of new projects to finish this year which I hope to show here. Thanks for reading!
Sunday, January 1, 2012
Quick Doll Carrier
Happy New Year everyone!! I have had a great couple of weeks with lots of family, food and fun galore! I am spending a couple weeks in Southern California and so I have been taking a bit of a hiatus from making things, but it couldn’t last too long! We were invited to a birthday party for one of my dear friend’s daughters. I have been thinking about making a doll carrier for a while and thought this would be the perfect opportunity to make it happen. I fashioned this carrier after a Baby Ergo. My daughters loved playing with this and hopefully our little friend will too!
This is a picture of the carrier with my ever-so-willing daughter modeling it. She was only willing to make crazy faces that day, so this is one of the best ones we have, but you get the picture of how it works :)
To start I used:
1 - 12 x 18 in. piece of fabric
2 – 4 x 45 in. strips of fabric
iron on interfacing
scrap fabric
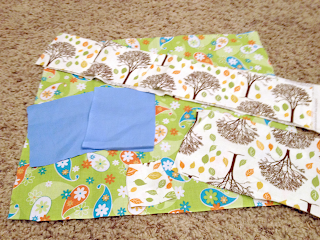
This is the fabric I used for another carrier that I made. Mostly just extra fabric that I had saved in my stash.
I took one of the long strips of fabric and sewed wrong sides together.
I then flipped it inside out and pressed it to create a nice seam.
I then took the length of the strip and put the middle lined up with the middle of the 18x24 piece. The panel piece I finished with a hem on all four sides.
I then topstitched around the edges of the strip and sewed it to the panel piece. I finished the ends of the strip by folding the ends in and stitching it shut.
This is what the piece looked like after it had been sewn together.
I then sewed the other strip of fabric together and turned it inside out as shown above. I then sewed it with an X stitch at the top of the panel. To make the stitch start at one corner and make a straight stitch until you hit a corner. Leave your needle in and turn your fabric and continue stitching until you finish the square.
This is what it should look like when you are done. I then cut the strip in half and finished the edges. It should be tied around the back on the bottom and around the neck at the top. I also used interfacing and scrap fabric to add a monogram for the little girl that this was for.
My daughter also tried it on her back, but but preferred it on her front :) Happy New Years to you all!


